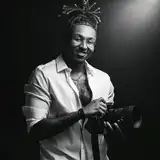
Amazing 1 on 1 With Dae: My Full Blueprint: From Pricing to Posing to Posting — No Gatekeeping w/Note taking caption
Added 2025-07-22 12:00:00 +0000 UTC🧠 Photography Gameplan: Everything Stretch Broke Down (Raw + Real)
Full summary + key bullet points for folks trying to level up in grad photography
💰 When & How to Raise Your Prices
“If you’re getting booked out, your price is too low. Period.”
Raise prices between semesters, never mid-season — keep things clean and consistent.
If people are booking you nonstop at your current rate, that’s a signal your price isn’t exclusive enough.
Test the waters: Slight bump per semester to see what your market supports.
Rule of thumb: If you're doing 25 shoots at $100/week, raise to $200 and do half as many to make the same (or more).
Create exclusivity — you don’t want to be the photographer everybody can book.
Look around at local market rates, but also set the standard if no one else is.
🧠 Dealing with Imposter Syndrome
“You’re always gonna feel like your work could be better. Do it anyway.”
Even top-level shooters still feel it — it doesn’t go away, but you get used to it.
You’ll always be your toughest critic. Your audience usually sees your work very differently (in a good way).
Only way to beat it: keep creating. Keep posting.
Eventually you stop comparing yourself — it becomes muscle memory.
📆 When to Promote Grad Packages + Ads
“The two biggest ad windows: when the semester starts + when financial aid drops.”
Best time to start talking about the next season is right after the current semester ends.
Start running ads once the new semester begins and again when refund checks hit — that’s when people are ready to book.
Summer's weird (less students) — so you can start promoting fall earlier while people are planning ahead.
🎬 Using Meta Glasses / BTS Content Strategy
“The main thing I always capture: setup, test shots, reactions.”
Don’t just film everything — think like a storyteller.
Record:
Lighting setup
Camera prep / test shots
Client reactions (huge for engagement)
Use “Shot vs. Reaction” style reels — these perform best and show your value instantly.
🔥 Smoke Bomb Editing Breakdown (Photoshop)
“You don’t need multiple smoke bombs — just clone the one you’ve got.”
Steps:
Use Lasso Tool to outline the smoke.
Go to Select & Mask, feather it (~60–80px).
Hit New Layer with Layer Mask.
Flip Horizontal to mirror the smoke to the other side.
Mask out your subject using Quick Selection Tool.
Use Clone Stamp Tool to clean up the gaps.
Done.
✅ Pro Tip: Plan your shots with editing in mind — clean backgrounds help a ton.
⚙️ Burnout-Proof Workflow
“I only shoot after 3PM. Three shoots a day max. That’s it.”
Stick to a repeatable daily system:
Shoots at 3:00 / 5:30 / 8:00 PM.
Uploads that night via Pixieset.
Deliver links in the morning.
Use Veedo or outsource editing if you're slammed.
Editing = optional, not mandatory.
Keep shoots consistent — most grads want similar shots anyway.
Don’t chase chaos. Build routine.
📈 How to Grow Your Social Media Presence
“I don’t run ads on reels — I just post consistently.”
Most growth comes from consistency, not paid ads.
Focus on TikTok + IG Reels — show your process, teach a little, give value.
Cross-collab: Tag or collab your visuals page from your main page reels.
Helps both pages grow together.
Repost your best-performing topics (lighting setups, editing tips, behind-the-scenes).
Use captions like “How I shot this…” or “My 2-light setup for harsh light”.
🖼️ Photo Reviews + Composition Tips
“If something feels off, it's usually distance, balance, or symmetry.”
For champagne shots — step back more. Wider = more drama.
Shooting with flames? Balance subject on one side and flame on the other — aim for symmetry or intentional asymmetry.
Libraries, desks, backgrounds — align with window frames, extend elements in post if you can’t move stuff IRL.
Backgrounds messy? Use his “Seamless Backdrop Edit” tutorial to clean it up in post.
🎯 Studio & Grad Shooting Tips
“Get used to placing people fast. The poses don’t need to be crazy — just clean.”
Get a mannequin or system to practice poses and angles.
Stick to repeatable lighting setups.
Use reflectors, fill lights, and position changes to deal with harsh light.
Don’t overthink distance — if the framing’s clean and the client loves it, it works.
🧮 Compression: 85mm vs 105mm?
“Not a huge difference. 105 might be sharper, but 85 gives better color.”
85mm = more versatile, easier to work in tighter spaces.
105mm = better compression, slightly sharper.
Use whichever suits your location/shoot — don’t overthink it.
🧠 Standing Out in a Crowded City
“You gotta build what no one else is doing. Be the standard.”
Lifestyle shooters are common — grad/studio w/ lighting makes you stand out.
Stretch grew by posting what nobody else in his city was doing — mainly reels + consistent look.
Offer value plus something tangible:
Free smoke bomb
1–3 day turnaround for the first X bookings
Reels or TikToks of the session
💼 Package & Pricing Structure Tips
“The goal is to make the 3rd package look like the best deal.”
Pricing Ladder Strategy:
Increase each tier by $100.
Set your Bronze/Starter at $150, then go up: $250 / $350 / $500+.
Make one package the "best value" and clearly show what makes it worth it.
Offer 5–8 retouches on the starter, then add more edits/locations/outfits each tier.
Make your top tier feel luxury — offer real extras: reels, multiple edits, premium effects.
🧾 Final Note from Stretch:
“If you're doing what I’m doing, but better — I love that. Don’t overthink sounding like me.”
You’re not copying — you’re learning.
His system is meant to be borrowed and upgraded.
As long as you're serving your clients, adding value, and refining your look, you’re on the right path.
✅ Things I'm Acting On Now:
Rebuilding my packages with clear pricing jumps and value tiers.
Planning BTS content with reactions + lighting setups.
Running ads when the semester hits and refund season drops.
Posting reels that teach and entertain.
Using the smoke bomb edit method to clean up my shots in post.